

How To Transfer eSim From Android To iPhone: Ultimate Guide in 2026
Transferring an eSIM from Android to iPhone isn’t as straightforward as moving a physical SIM card. Unlike iPhone-to-iPhone transfers, there’s no direct “Quick Start” equivalent for Android-to-iPhone eSIM migration. Most carriers require you to obtain a new eSIM activation code for the iPhone, which means the process involves carrier intervention rather than a simple device-to-device transfer.
Quick Answer
- Keep your Android phone active with the current eSIM
- Contact your carrier (app, website, or store) to request a new eSIM for iPhone
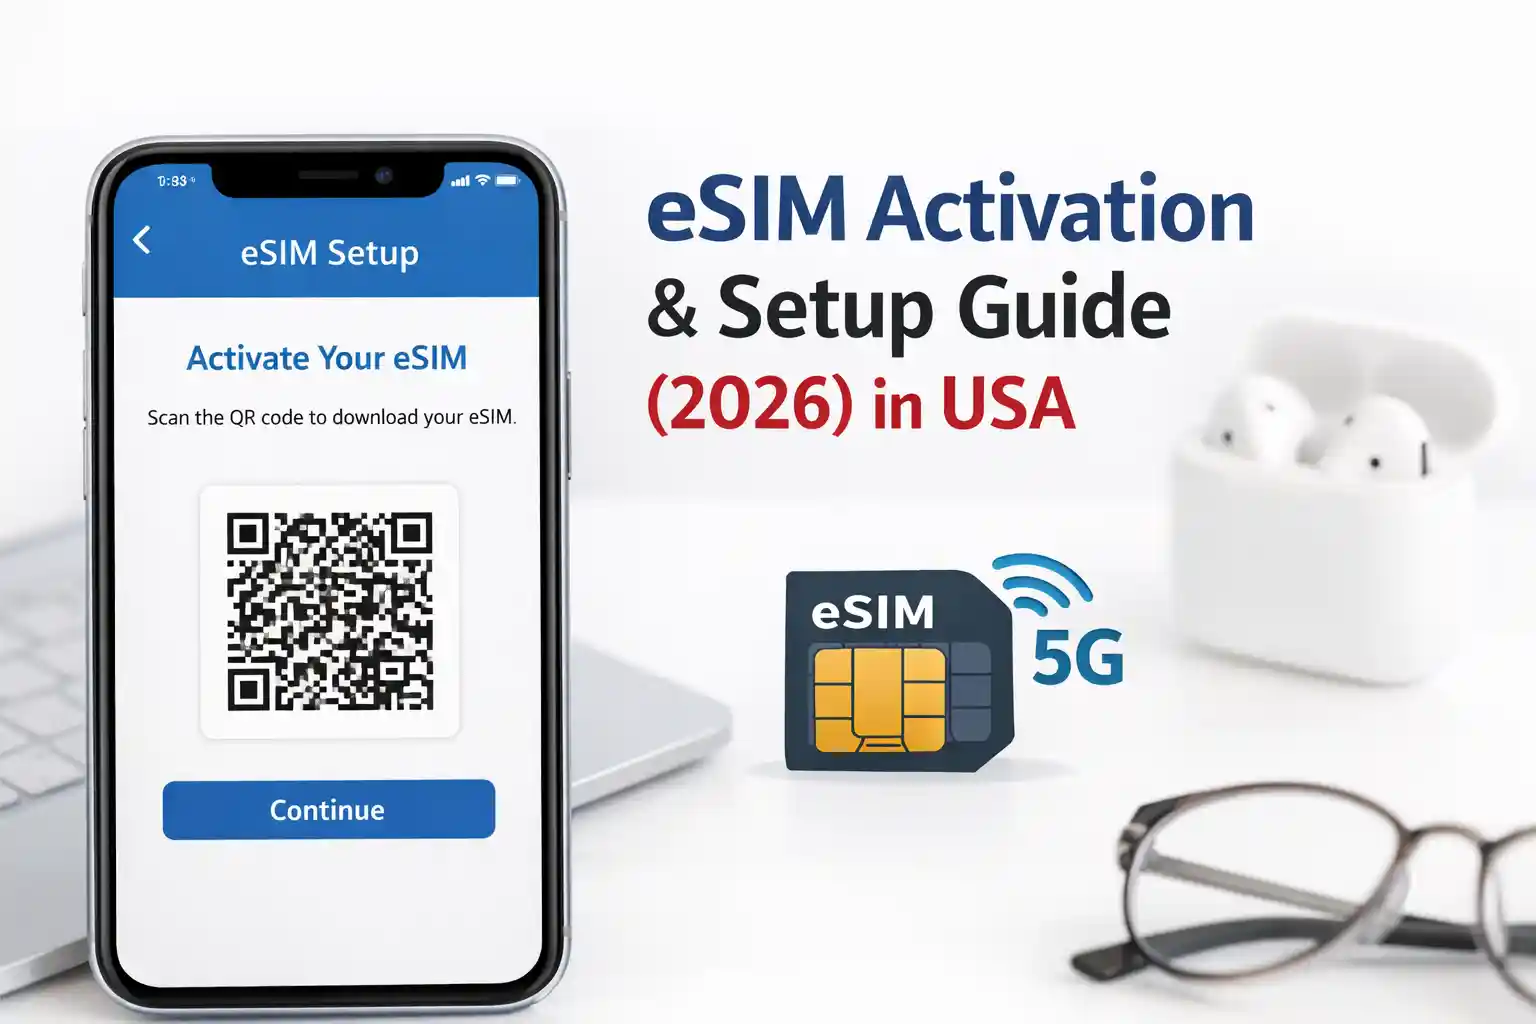
- On iPhone, go to Settings → Cellular → Add eSIM
- Scan the new QR code provided by your carrier
- Label the plan and set it as primary if needed
- Wait for activation (usually 2-15 minutes)
- Remove the eSIM from your Android device once iPhone is active
Important: You cannot directly transfer an eSIM from Android to iPhone without carrier involvement. Each carrier handles this differently, some allow instant self-service, others require a store visit.
What You’ll Need
| Requirement | Details |
|---|---|
| iPhone model | iPhone XS or later (eSIM compatible) |
| iOS version | iOS 12.1 or later |
| Android phone | Must remain active during transfer |
| Carrier account | Active account in good standing |
| Wi-Fi connection | Stable internet for both devices |
| Carrier support | Some require store visit or phone call |
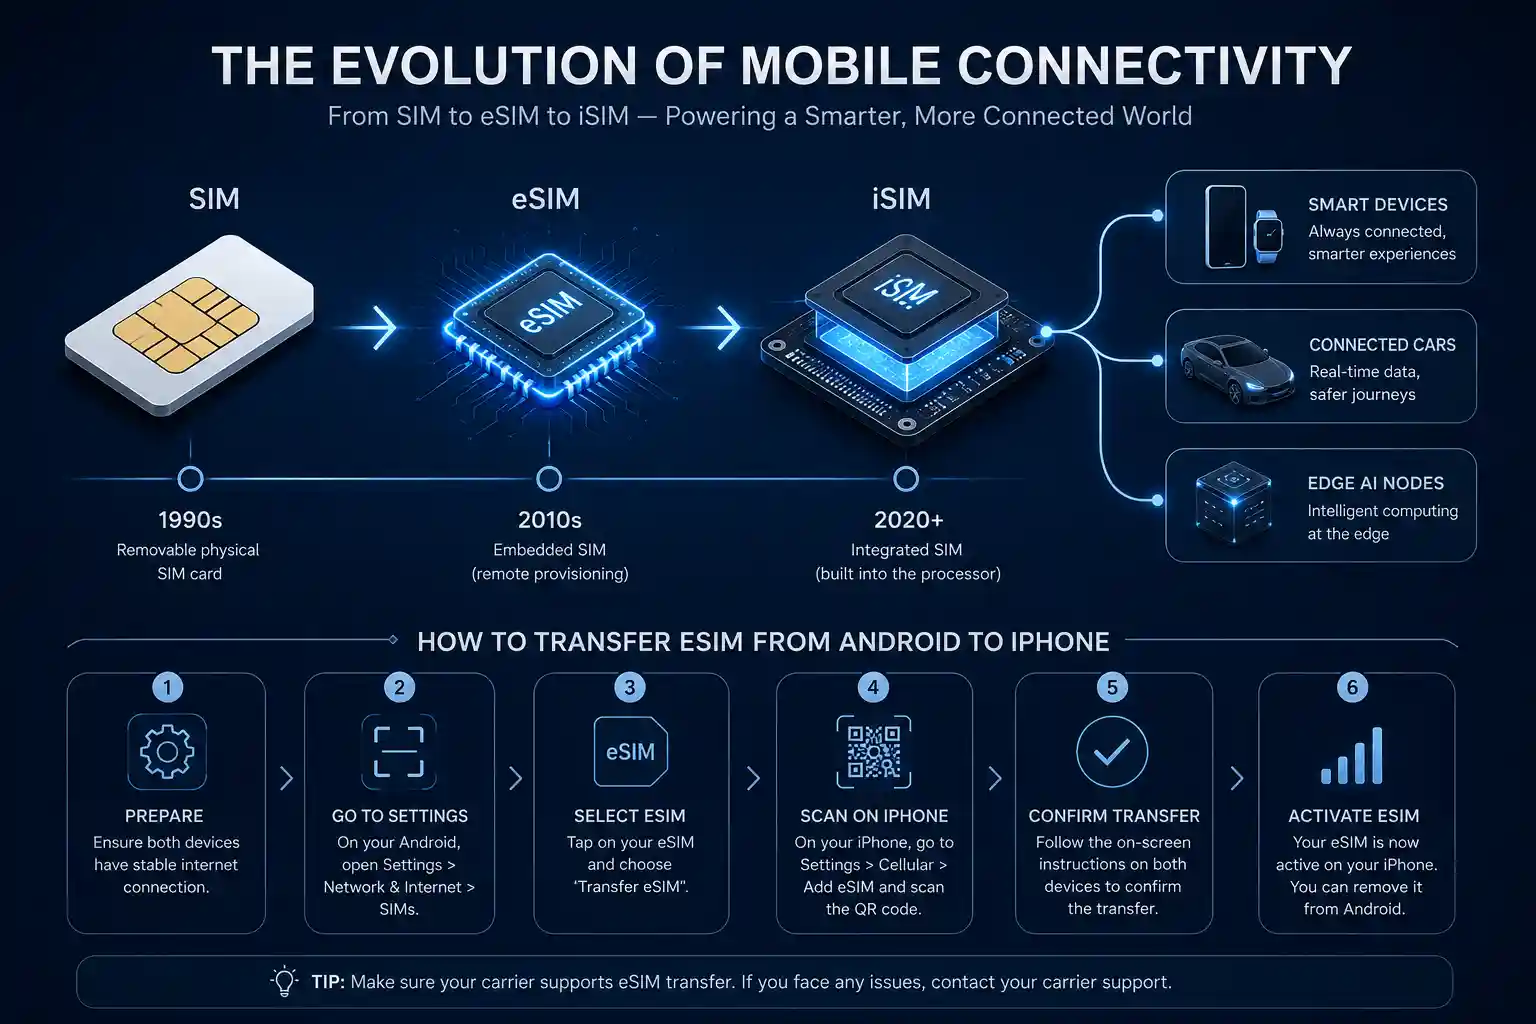
Step-by-Step Transfer Process
Step 1: Verify Carrier Compatibility
Before starting, confirm that your carrier supports eSIM on iPhone. Major US carriers (Verizon, T-Mobile, AT&T) and most international carriers support iPhone eSIM, but activation methods vary significantly.
Check your carrier’s website or app for “eSIM activation” or “digital SIM” options. Some carriers like T-Mobile allow instant eSIM generation through their app, while others like certain regional carriers may require visiting a retail location.
Step 2: Request New eSIM from Carrier
This is the critical step that catches most people off guard. You need a new eSIM profile specifically for your iPhone. Carriers treat this as a SIM replacement, not a transfer.
Self-service options (fastest):
- Log into your carrier account online or via app
- Look for “Replace SIM,” “Switch Devices,” or “eSIM Activation”
- Select iPhone as the target device
- Choose eSIM delivery method (QR code, app download, or email)
Store visit required (some carriers):
Carriers like certain MVNOs or international providers may require in-person verification. Bring your iPhone and valid ID. The process takes 10-20 minutes.
Warning: Do NOT remove the eSIM from your Android phone until the iPhone is fully activated. You’ll lose service temporarily during the switch.
Step 3: Prepare Your iPhone
Before scanning the QR code:
- Update to the latest iOS version (Settings → General → Software Update)
- Connect to Wi-Fi (cellular data won’t work for activation)
- Ensure Bluetooth is enabled
- Have your Apple ID password ready
Step 4: Install the eSIM on iPhone
The installation method depends on how your carrier delivered the eSIM:
Method A: QR Code (most common)
- Open Settings → Cellular (or Mobile Data)
- Tap “Add eSIM” or “Add Cellular Plan”
- Select “Use QR Code”
- Scan the QR code from your carrier (display on computer or second device—not from your Android phone screen)
- Wait for “Cellular Plan Ready” message
Method B: Carrier App
- Download your carrier’s app from the App Store
- Log in with your account
- Follow in-app eSIM installation prompts
- The app will automatically configure the eSIM
Method C: Manual Entry
- Settings → Cellular → Add eSIM
- Select “Enter Details Manually”
- Input the SM-DP+ address and activation code from your carrier
Step 5: Configure Cellular Settings
After installation, you’ll need to configure how the eSIM works:
- Label the plan: Name it (e.g., “Primary,” “Travel,” “Work”)
- Set default line: Choose which number handles calls, messages, and data
- Enable this line: Toggle on to activate service
- iMessage & FaceTime: Go to Settings → Messages/FaceTime to register your number
Activation typically completes within 2-15 minutes. You’ll see signal bars appear once the carrier provisions the eSIM on their network.
Step 6: Remove eSIM from Android
Once your iPhone shows active service:
- On Android, go to Settings → Network & Internet → Mobile Network
- Find your eSIM profile
- Select “Delete” or “Remove”
- Confirm deletion
This prevents duplicate registration on the carrier’s network, which can cause routing issues.
Why Direct Android-to-iPhone eSIM Transfer Doesn’t Work
Unlike iPhone-to-iPhone transfers that use Apple’s encrypted Quick Start protocol, there’s no cross-platform eSIM migration standard. Here’s what’s actually happening:
eSIM profiles are carrier-specific: Each eSIM contains unique cryptographic keys tied to your carrier’s network
Platform encryption differs: Android and iOS use different secure element architectures
Carrier provisioning systems: Carriers must explicitly authorize each eSIM installation
GSMA limitations: The remote SIM provisioning standard doesn’t include cross-platform migration
Apple’s support documentation explicitly states that eSIM transfers only work between iPhones running iOS 16 or later. Android users must go through carrier re-provisioning.
Common Transfer Failures & Fixes
Problem: QR Code Won’t Scan
Cause: Screen brightness too low, QR code expired, or camera focus issues
Fix:
- Increase brightness on the device displaying the QR code
- Request a fresh QR code (they typically expire after 15-30 minutes)
- Use manual entry as a backup method
- Display the QR code on a computer screen rather than phone screen
Problem: “Cannot Activate eSIM” Error
Cause: Carrier hasn’t provisioned the eSIM, network connectivity issues, or account restrictions
Fix:
- Toggle Airplane Mode on for 10 seconds, then off
- Restart the iPhone
- Verify Wi-Fi connection is stable
- Contact carrier to confirm eSIM is activated on their end
- Check if your account has any holds or payment issues
Problem: No Service After Activation
Cause: APN settings incorrect, carrier settings outdated, or network registration failure
Fix:
- Go to Settings → General → About → check for carrier settings update
- Manually configure APN: Settings → Cellular → Cellular Data Network (if available)
- Reset network settings: Settings → General → Transfer or Reset iPhone → Reset → Reset Network Settings
- Remove and re-add the eSIM profile
Problem: Android eSIM Deletion Fails
Cause: eSIM still active on carrier network, Android system glitch
Fix:
- Wait 1-2 hours after iPhone activation, then try again
- Force stop the Settings app and retry
- Contact carrier to remotely deactivate the Android eSIM
- Factory reset Android as last resort (backup data first)
Carrier-Specific Considerations
US Carriers
Verizon: Supports instant eSIM activation through My Verizon app or website. No store visit required for most accounts. eSIM QR codes valid for 24 hours.
T-Mobile: Allows self-service eSIM through T-Mobile app. Can also use “Transfer eSIM” feature if switching from iPhone, but Android requires new eSIM generation.
AT&T: Requires account holder verification. Online activation available but may trigger fraud checks requiring phone call verification.
International Carriers
European carriers (Vodafone, Orange, O2) typically offer instant eSIM through customer portals. Asian carriers vary—some like Singtel allow app-based activation, while others require retail presence.
Travel eSIM providers (Airalo, Holafly, Nomad) are easiest to switch since they’re app-based. Simply install the app on iPhone and re-download your plan.
Travel and Roaming Scenarios
Switching While Abroad
If you’re traveling and need to switch from Android to iPhone:
- Keep Android active: Don’t remove the eSIM until you’re on stable Wi-Fi.
- Download carrier app beforehand: Some carriers block account access from foreign IP addresses.
- Time zone considerations: Carrier support hours may differ from your location.
- Roaming charges: Both devices may incur charges during transition if both are active.
Airport Wi-Fi often interrupts eSIM transfers because activation depends on stable carrier communication. Wait until you’re at your hotel or have reliable internet.
Dual SIM Travel Setup
iPhone supports dual eSIM (iOS 17+) or one physical SIM + one eSIM. Consider keeping your home eSIM active while adding a local travel eSIM:
- Install travel eSIM as secondary line
- Set travel eSIM for data only
- Keep home eSIM for calls/texts
- Enable Data Roaming only on travel eSIM
What Most Guides Oversimplify
Many tutorials skip critical details that cause real-world problems:
1. iMessage Registration Delays
Even after eSIM activation, iMessage and FaceTime can take up to 24 hours to register your new number. During this window, messages may fail or route incorrectly. You’ll see “Waiting for activation” under Settings → Messages.
2. Two-Factor Authentication Lockouts
If your phone number receives 2FA codes and you lose service during transfer, you can get locked out of accounts. Before starting:
- Generate backup codes for critical accounts
- Add authenticator apps as backup
- Update recovery phone numbers to secondary contacts
3. Voicemail Transfer Issues
Visual voicemail doesn’t automatically transfer. You may need to:
- Call your voicemail from the iPhone to set it up
- Re-record greetings
- Wait 24 hours for voicemail-to-text to activate
4. WhatsApp Number Verification
WhatsApp ties to your phone number. When switching:
- Use WhatsApp’s “Change Number” feature BEFORE removing Android eSIM
- Or backup chats to Google Drive, then restore on iPhone (requires Move to iOS app)
- Group memberships and settings don’t always transfer cleanly
Frequently Asked Questions
Can I transfer the same eSIM from Android to iPhone without carrier help?
No. Unlike iPhone-to-iPhone eSIM transfers using Quick Start, there’s no direct transfer method from Android to iPhone. You must obtain a new eSIM profile from your carrier. The carrier needs to deactivate the Android eSIM and provision a new one for your iPhone.
How long does eSIM activation take on iPhone?
Typically 2-15 minutes after scanning the QR code. However, full activation including iMessage, FaceTime, and carrier services can take up to 24 hours. If activation takes longer than 30 minutes, contact your carrier—there may be a provisioning issue.
Will I lose my phone number when switching?
No, you keep your existing phone number. The carrier transfers your number to the new eSIM profile. This is a SIM replacement, not a number change. However, ensure you’re requesting a “SIM replacement” or “device change,” not a “new line” when contacting your carrier.
Can I have eSIM on both Android and iPhone simultaneously?
Technically yes, but not recommended. Carriers generally don’t allow the same number active on two devices simultaneously as it causes routing conflicts. Some carriers may allow it briefly during transfer, but you should remove the old eSIM once the new one is active.
What if my carrier doesn’t support iPhone eSIM?
If your carrier doesn’t support eSIM on iPhone, you have three options: (1) Use a physical SIM card if your iPhone model has a SIM tray, (2) Switch to a carrier that supports eSIM, or (3) Use Wi-Fi calling and messaging apps as temporary workarounds. Check Apple’s carrier support page for eSIM compatibility.
Do I need to backup my Android phone before eSIM transfer?
The eSIM transfer itself doesn’t require Android backup, but you should backup your Android phone before switching devices. Use Google One backup or your manufacturer’s cloud service. Contacts, messages, and app data won’t transfer automatically to iPhone—you’ll need the Move to iOS app during iPhone setup or manual transfer.
Can I transfer eSIM if my Android phone is broken?
Yes. If your Android phone is broken or inaccessible, contact your carrier directly. They can deactivate the old eSIM remotely and issue a new one for your iPhone. You may need to verify your identity through account security questions or visit a store with ID.
Why does my iPhone say “No Service” after eSIM installation?
This usually means the carrier hasn’t completed provisioning on their end. Try: (1) Toggle Airplane Mode, (2) Restart iPhone, (3) Check for carrier settings updates in Settings → General → About, (4) Contact carrier to confirm eSIM activation. If using a travel eSIM, verify you’re in a coverage area.
Final Checklist Before You Start
- ✓ iPhone is iPhone XS or later
- ✓ iOS updated to latest version
- ✓ Stable Wi-Fi connection available
- ✓ Carrier account accessible (app/website credentials)
- ✓ Android phone charged and functional
- ✓ Backup codes for 2FA accounts generated
- ✓ Important contacts backed up
- ✓ Carrier support number saved
- ✓ 30-60 minutes of uninterrupted time
Final Thoughts
Transferring from Android to iPhone with eSIM requires patience and carrier cooperation. The process isn’t as seamless as Apple’s iPhone-to-iPhone Quick Start, but it’s manageable if you prepare properly.
The key is understanding that you’re not “transferring” an eSIM—you’re replacing it with a new one. Keep your Android active until the iPhone works, have backup authentication methods ready, and don’t hesitate to contact carrier support if activation stalls.
Most transfers complete within 30 minutes when everything goes smoothly. When complications arise, they’re usually resolvable with a carrier call or simple settings adjustment. The frustration comes from expecting instant cross-platform compatibility that doesn’t exist yet in the eSIM ecosystem.
About This Guide
Editorial Standards: This guide is based on carrier documentation from major US and international providers, Apple’s official eSIM support pages, and real-world testing across multiple carrier networks. We update this content when carriers change their eSIM activation procedures.
Last Updated: June 2026
Fact-Checking: All carrier-specific information is verified against official carrier support pages. Procedures vary by region and account type, always confirm with your specific carrier before starting the transfer process.
Corrections: If you encounter carrier procedures that differ from this guide, carrier policies change frequently. Contact your carrier’s support directly for the most current eSIM activation method.
Author Data
Caleb Vance is a telecommunications engineer and technical strategist specializing in mobile network infrastructure, SIM technologies, and next-generation wireless systems. He earned his Master of Science in Telecommunication Engineering from the University of Nebraska–Lincoln in 2021, focusing on signal processing and modern cellular protocols.
Currently working in network auditing and carrier infrastructure compliance within the United States telecom sector, Caleb focuses on translating complex connectivity systems into practical, understandable guidance for consumers and travelers. His work centers on real-world mobile behavior, eSIM deployment systems, roaming architecture, and consumer connectivity troubleshooting.